This is a tutorial on how to make your WordPress website have complete HTTPS through a CloudFlare domain without HTTP/HTTPS content mixing. Here we’ll be using the CloudFlare daemon instead of the WordPress plugin.
You will need…
- A WordPress website running already. If you do not have one, follow these instructions to make one.
- CloudFlare’s service daemon running on the server. If you do not have this running, follow these instructions to create the service.
NOTE: You should be able to access your WordPress website through your CloudFlare domain at least through plain HTTP before starting these instructions.
CloudFlare Settings
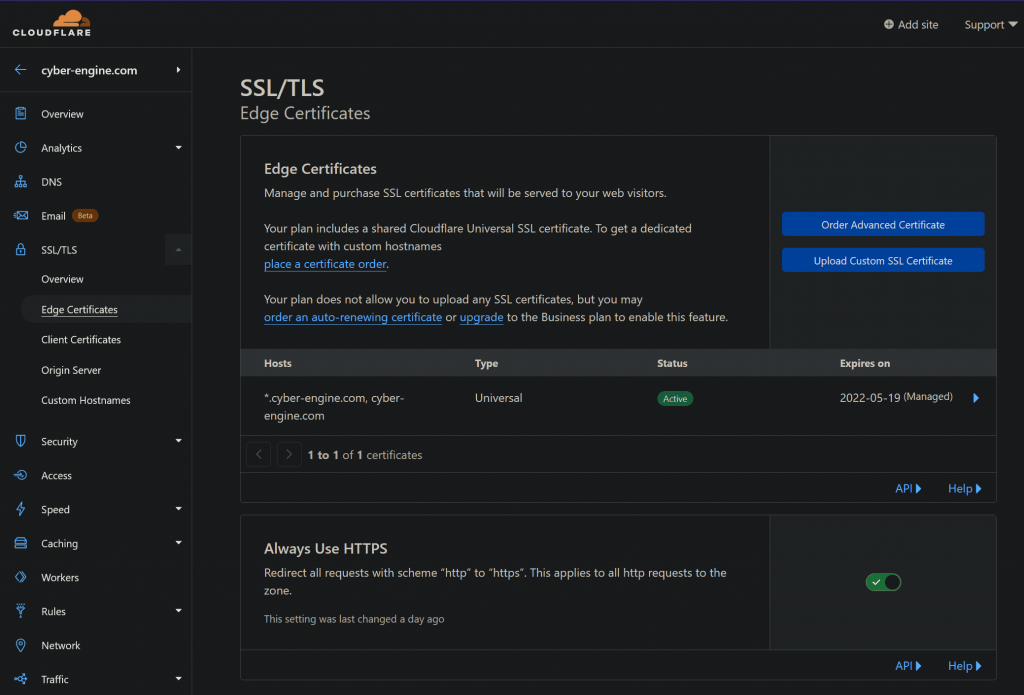
- Navigate to dash.cloudflare.com and select your website
- Go to the SSL > Overview, and change the SSL/TLS encryption mode to either
FullorFull (strict)

- I’d also recommend turning on
SSL/TLS Recommenderto see what else you probably should do for encryption in the future. - Navigate to SSL > Edge Certificates
- Turn on
Always Use HTTPS
Change the URLs on WordPress
- Login to WordPress
- Navigate to the WordPress Settings > General
- Change the two URLs there to read
https://<your cloudflare dns name>
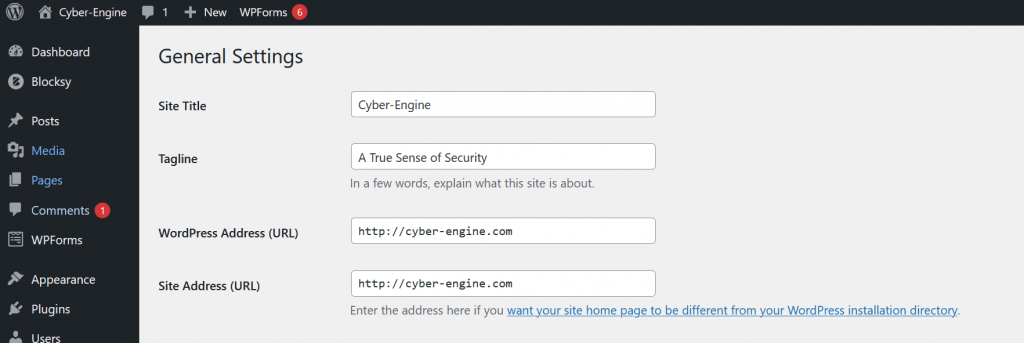
- Click “Save”
- Login to WordPress using the URL just used. In this case,
https://cyber-engine.com
Install Really Simple SSL
- Navigate to WordPress plugins > Add New, then search for “Really Simple SSL”
- Click “Install Now” and then “Activate”
- Once the plugin is active, navigate to WordPress Settings > SSL
- Click “Activate SSL”
- Click “Enable 301 .htaccess redirect”
- Click “Save”
Change all URLs to HTTPS
- Navigate to WordPress plugins > Add New, then search for “Better Search Replace”
- Click “Install Now” and then “Activate”
- Once the plugin is active, navigate to WordPress Tools > Better Search Replace
- Run a query like so to ensure that all
https://strings in the database are changed tohttps://
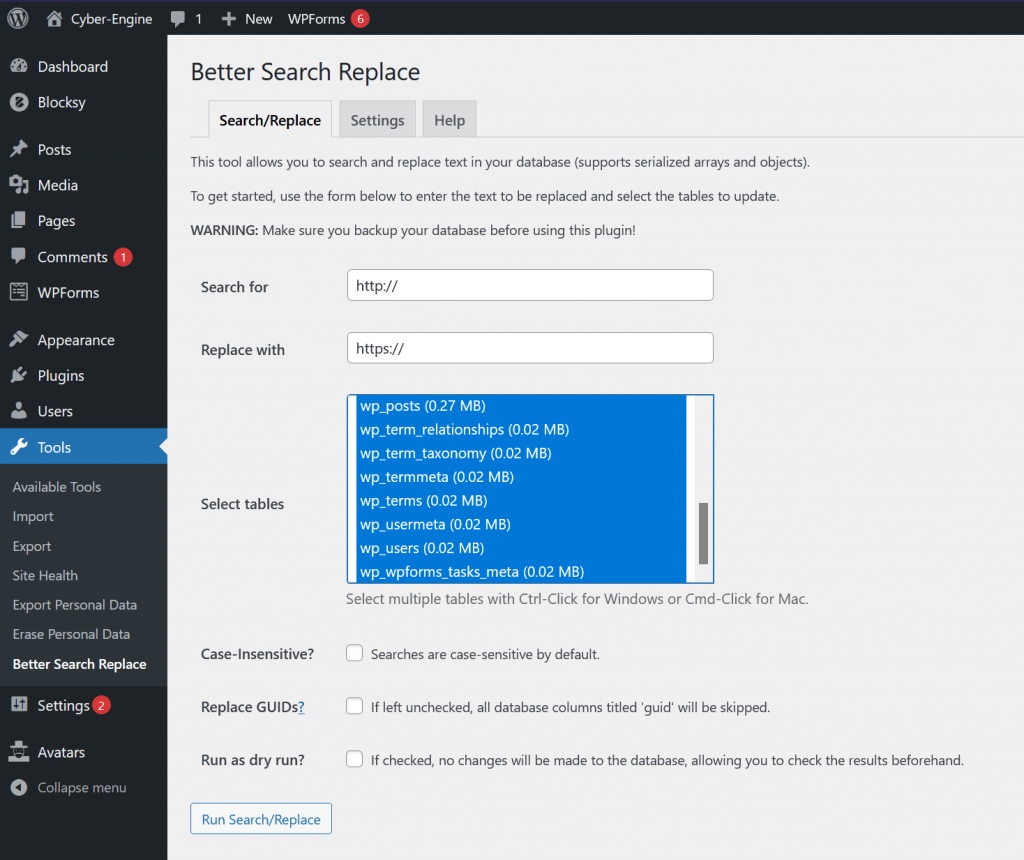
- NOTE: You will need to select ALL the tables. You can do this by selecting the first table, and holding SHIFT while selecting the last table.
- NOTE: You will need to uncheck the last box in order for any strings to be changed
Refresh Cache
- Go to your browser settings and delete cached website data so the website can now work as normal.
Conclusion
Now, unlike before, you should be able to access your WordPress website through HTTPS and your CloudFlare domain without HTTP/HTTPS content mixing.